i-Video app explained |
|
From live photo to 3D model, turn a video sequence into an interactive animation !
Advanced features include green screen masking and adding a new background image to provide illusion of a 3D model.
The resulting animation can be published, shared, converted to GIF or video, integrated to a website or blog...
You need a video format supported by your browser:
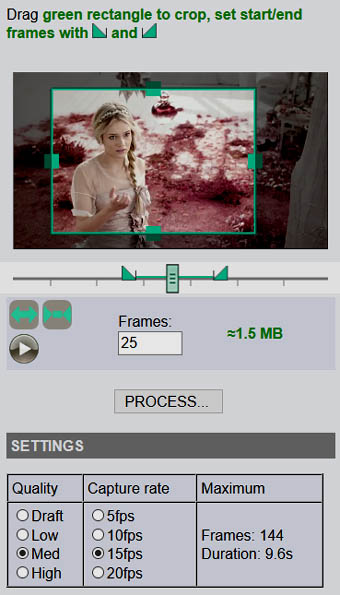
Use this screen to:
- Crop the video if needed
- Set start and end frames
- Adjust settings
- Preview using the play button
Use ![]() and
and ![]() to zoom in/out the timeline. Ticks represent 1 second.
to zoom in/out the timeline. Ticks represent 1 second.
≈1.5 MB shows an estimate of
the final animation size according to frames count and current settings.
Hit PROCESS to create the animation.
View the tutorial:

All you need is a uniform color sheet (green is the best but any color will work if it's very different from the subject color), a rotating tray and a video camera on tripod.
Make sure your object is well centered on the tray, start recording and slowly turn the tray clockwise at least 360°.
Convert your video to mp4 and load it with the i-Video app.
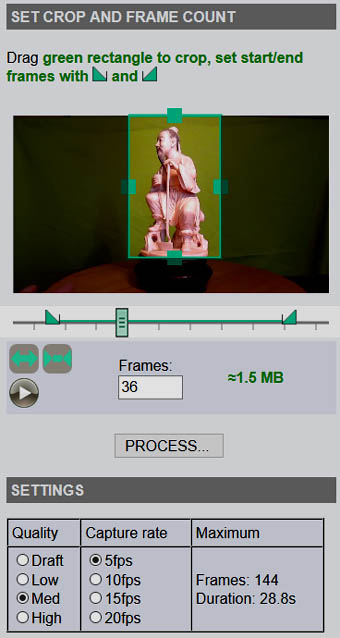
Crop the image to fit the subject.
Match start and end frames for a 360° rotation.
Hit PROCESS
On next screen, select MASKING - REMOVE BACKGROUND
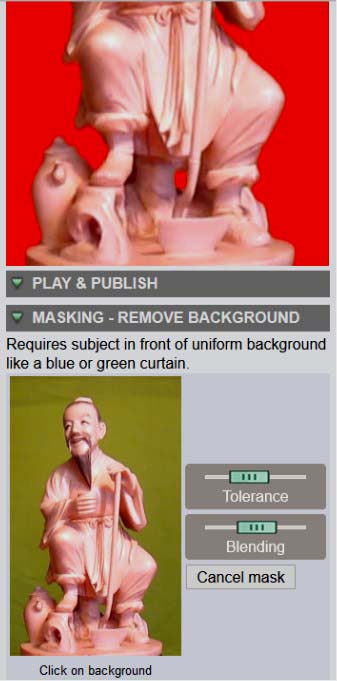
On the thumbnail, click/tap on the green background. The background turns to
red on the main image.
Use the sliders to adjust.
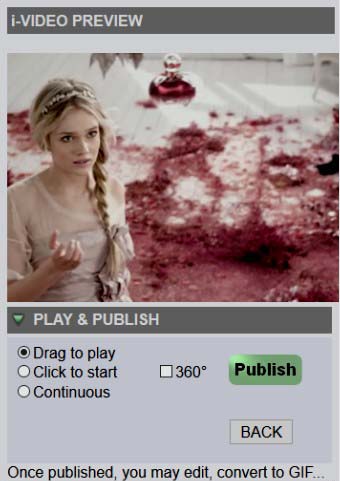
Then select PLAY & PUBLISH
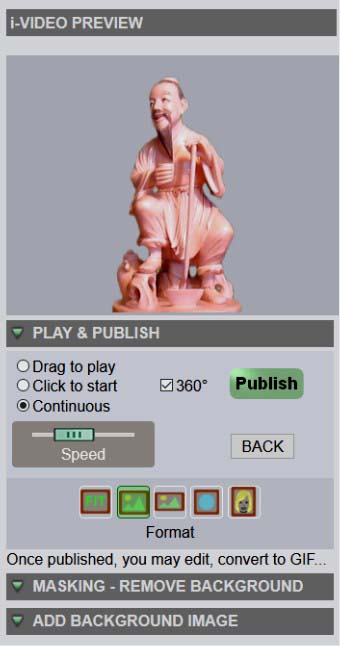
Select the final format.
Check 360°, select Continous and adjust the speed.
You may now add a background image and publish.
Subject not correctly
extracted from background?
No panic, a frame by frame editor is available on
the editor page!