Do It 3D - Tutorial |
|

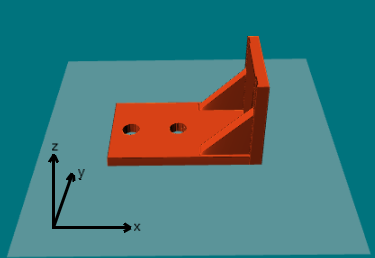
| Axis follow the STL convention, all dimensions are in mm. The basic principle is that Z=0 portions are not visible. |
|
Draw the outline of the shape using the selection tools, then give it Z volume by using the shape tools.
Selection tools hints:
Shape tools hints:
| |
|
|
The Tilt Shape Tool
Use Shift to constrain tilt to X or Y axis.. |
|
To use the Folding Tool
First draw a rectangle with only one edge crossing the shape. This determines the fold line. Order of folds is important. Always start from the outside of the shape. Use the Folding Tool with Shift to modify Z from folding line. |
|
Drawing with negative Z is possible by selecting the corresponding dig/grow tool When processing STL:
|
|
This video shows how easy it is to extrude from an aluminum profile section. For easier scaling, you may first position your image on the below build plane using an image editor. This build plane is 1000 x 1000px for a print dimension of 100x100mm (1 pixel = 0.1 mm)  Buid plane 1000x1000px (right click to save) |
|
Load a part top view drawing and use the "Magic marquee" tool
This video shows how to quickly create gearings and the functional print result. |
|
3 examples are shown, including starting from an image to create a pawn of
chess. To merge selections, use the Ctrl key. To revolve the shape, select the Spherical shape tool and use Ctrl+Shift |
Active selections are displayed in green (red for folds)
| Name | Action | with Shift key | with Ctrl key | |
|
| Rectangular marquee | Draw a rectangular selection | Draw a square | Merge with previous selection |
|
| Elliptical marquee | Draw an elliptical selection | Draw a circle | Merge with previous selection |
|
| Free hand lasso | Drag to draw a contour, release to close contour | - | Merge with previous selection |
|
| Line segments marquee | Click to define new point, double click or Enter to close contour | 0-45°-90°... angles |
if previous selection: merge If no previous selection: 0-60°-90°... angles |
|
| Magic marquee | Click on a drawing to automatically select a contour. Works only with well contrasted drawings. | - | - |
|
| Move selection |
If new selection: Move it If selection has volume: Duplicate it | Rotate selection | - |
 | Lock selection | Use TAB to select (active selection is displayed in green) | - | - |
|
| Vertical Shape | Add vertical volume (Z) to active selection | Start from Z=0 | - |
|
| Spherical Shape | Add spherical volume to active selection | Start from Z=0 |
Change to cylinder Ctrl+Shift: Revolution volume |
|
| Soft Shape | Add soft (cubical) volume to active selection | Start from Z=0 | - |
|
| Pyramidal Shape | Add pyramidal volume to active selection | Start from Z=0 | - |
|
| Tilt Plane | Tilt active selection, starts always from Z=0 | Constrain to X or Y axis | - |
|
| Fold |
Requires active rectangular selection, with only one edge crossing the shape.
This edge defines the folding line. Z from folding is maxZ/2, maxZ being maximum
Z from fold line. Active folding selection is displayed in solid red, other foldings in dotted red. | Modify Z from folding | - |
|
| Allow Z >= 0 only | Default | - | - |
|
| No constraint on Z | - | - | |
|
| Allow Z <= 0 only | - | - |